This week we are looking at my favorite type of automated tests: services tests. The reason I love services tests is because they test so much of the application without the hassle of the UI. There are many types of services, but the most widely used service is the REST API. And my favorite way to test a REST API is with Postman.

I’m not going to get into too many details about REST verbs or about Postman, because I have already done so in earlier blog posts. If you’d like to catch up on what I’ve written, you can start with this post and work your way forward week by week. You can also read this tutorial that I wrote for Simple Programmer.
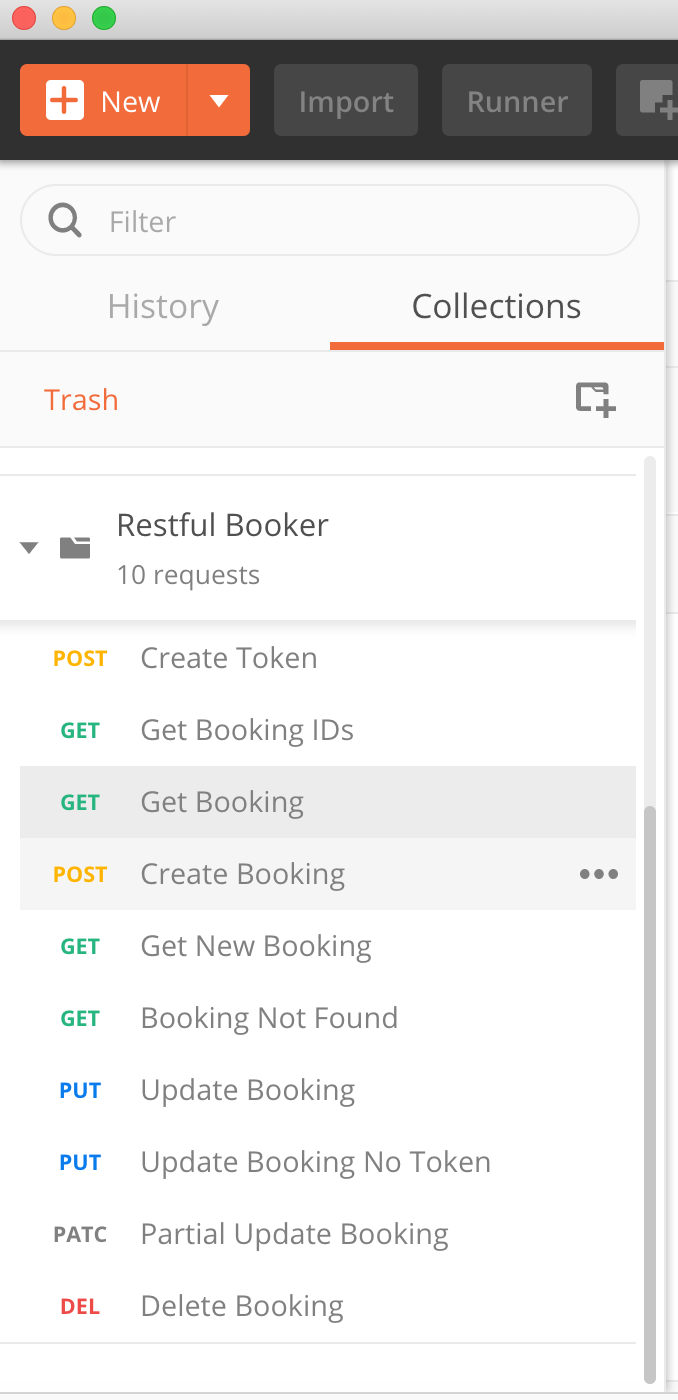
This post will focus on how you can automate Services Tests. To demonstrate, I’ve created a collection of Postman tests that you can download from Github here. The API I’m testing is called Restful-Booker: it’s a great easy API created by Mark Winteringham to help people learn how to test APIs.
Once you have downloaded the two files from Github, you can upload them in Postman to see what they do. To upload the collection, click on the Import button on the top left of the Postman window:

When the Import window pops up, click the Choose Files button and then navigate to the location of the file you downloaded called restfulbooker.collection.json. Click on that file name, and the collection will be imported:
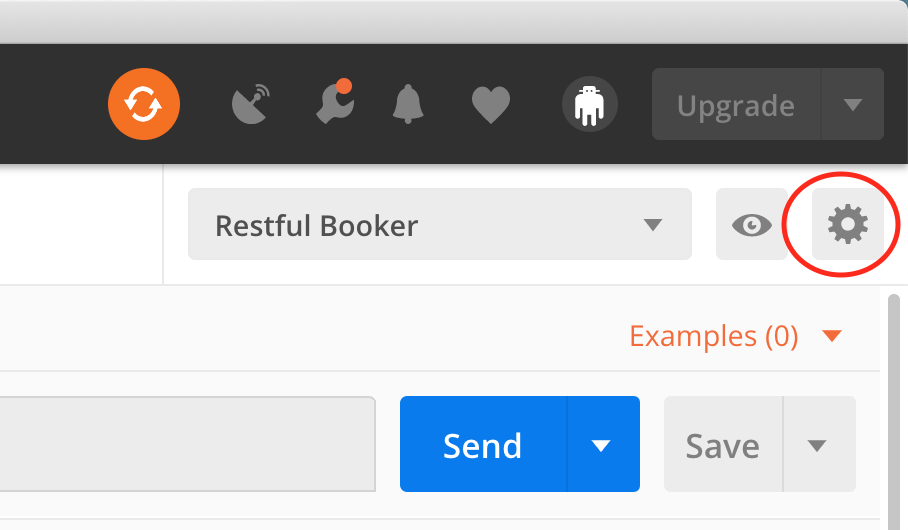
Next, you’ll need to upload the environment file. The environment file is what contains the variables that are used in the requests and assertions. To upload the environment file, click on the gear icon in the top right of the Postman window:
When the environment window pops up, click on the Import button, then on the Choose Files button, then navigate to the location of the downloaded file called restfulbooker.env.json. Click on that file name and the environment will be imported:
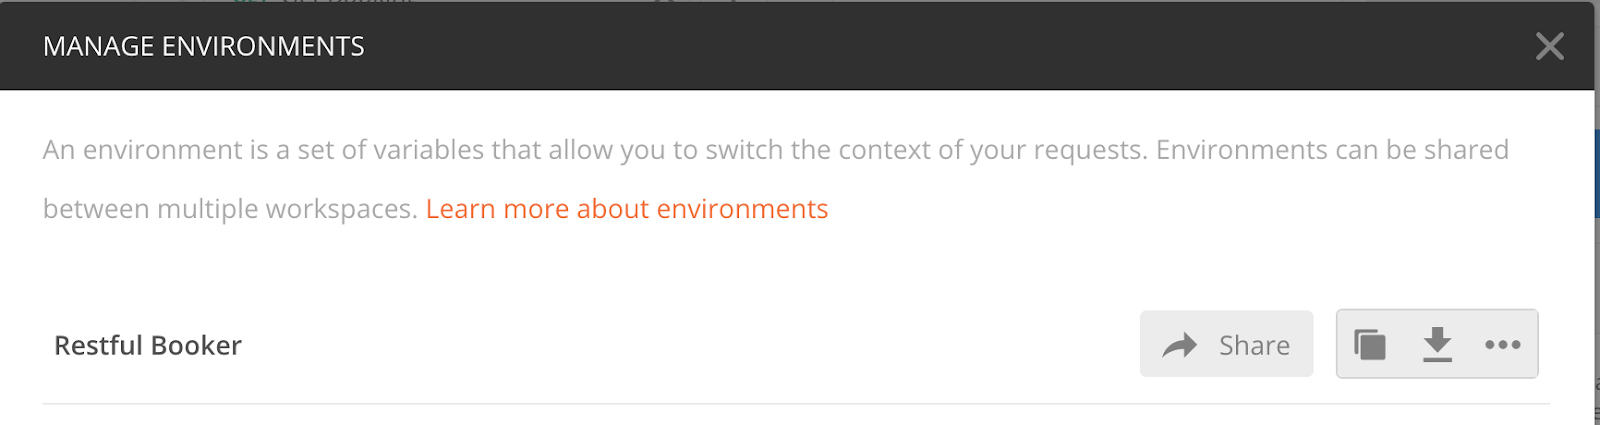
Finally, in the dropdown menu in the top right, select the Restful Booker environment:

You are now ready to run the requests from within Postman. Keep in mind that the tests are not idempotent: some of the requests depend on previous requests for setting variables and creating bookings, so while you are exploring you should run the requests in order.
Let’s take a look at one of the requests and its assertions:
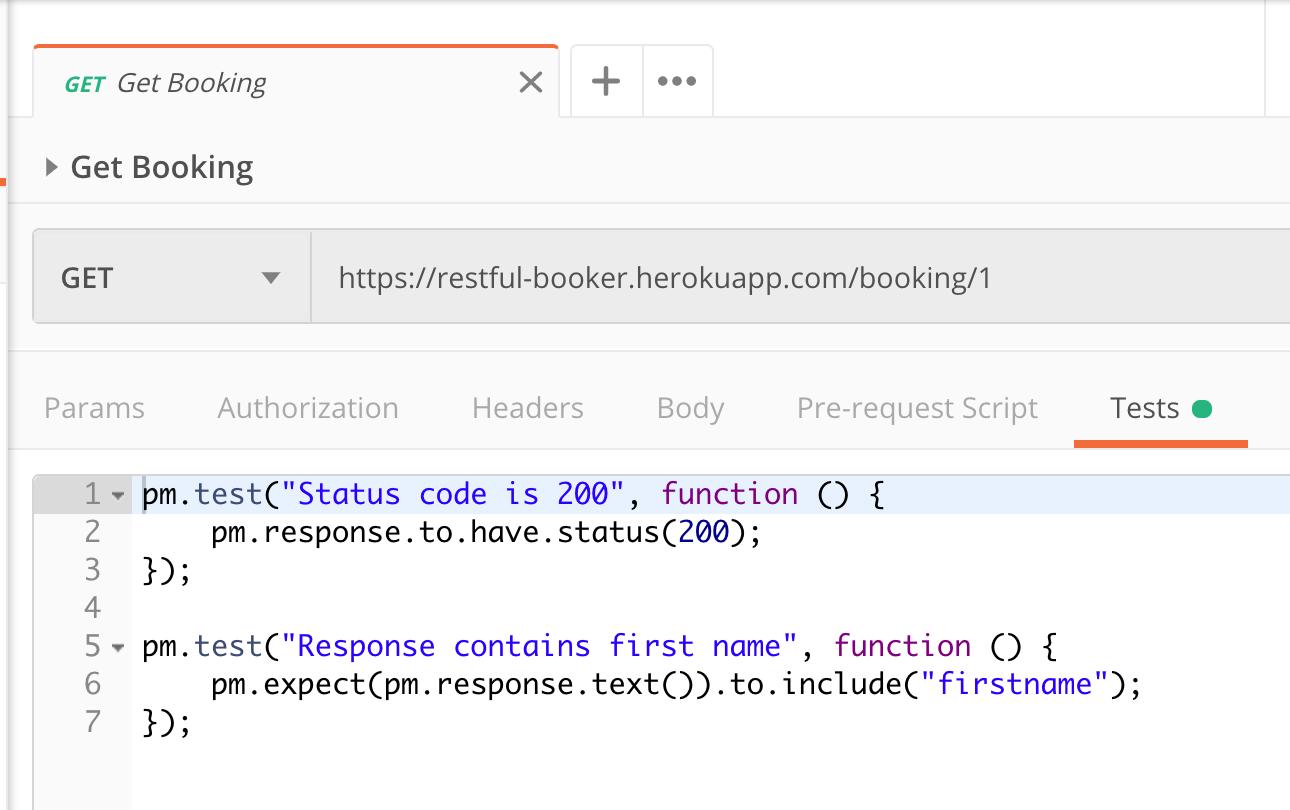
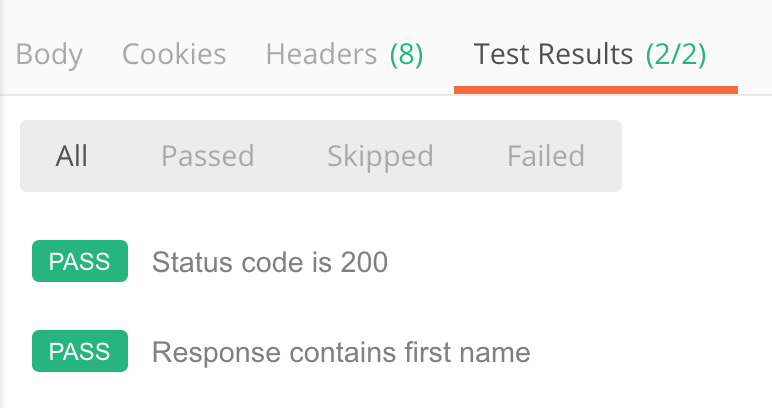
This is a GET request. The URL of the request is https://restful-booker.herokuapp.com/booking/1. The request is asking for the booking with the id of 1. You can see two tests in the Tests section: the first test verifies that the response code of the request is 200, and the second test verifies that “firstname” is one of the fields in the response.
Click the Send button to run the request, then scroll down to the bottom of the page:
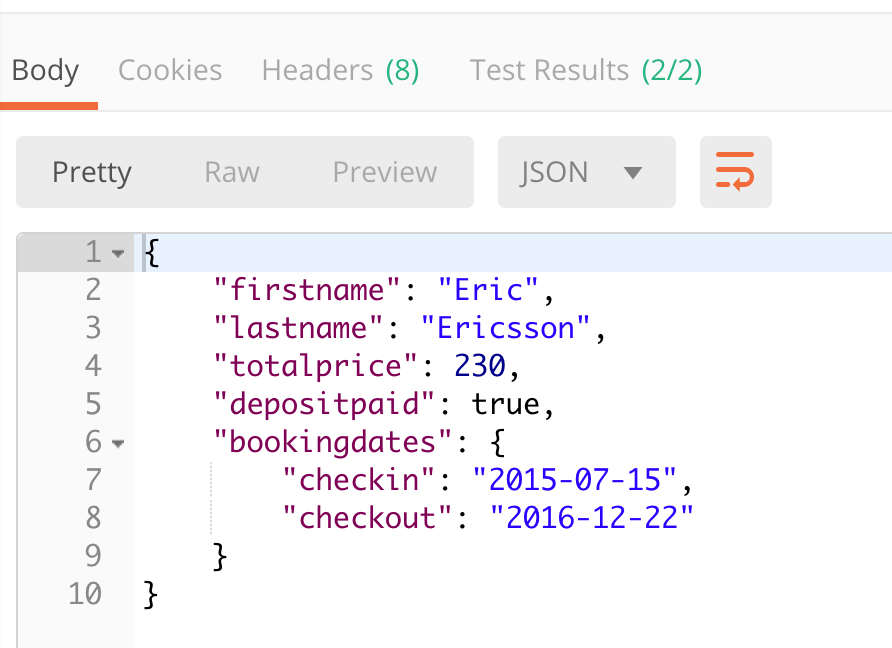
Here you see the body of the response, which has returned a booking. You can also see a tab called Test Results, which shows that 2 out of 2 tests pass. If you click on this tab, you can see your results:
Now that you understand how the tests and assertions work, let’s run them from the command line! In order to do this, you will need to have node.js installed. Installing node will also install npm, which is the node package manager. Then you can use npm to install Newman, the package that is used to run Postman tests. To install Newman, simply open your command-line window and type:
npm install -g newman
Once Newman is installed, navigate in the command-line window to the place where your restfulbooker.collection.json and restfulbooker.environment.json files are located. Now you can run your tests with this command::
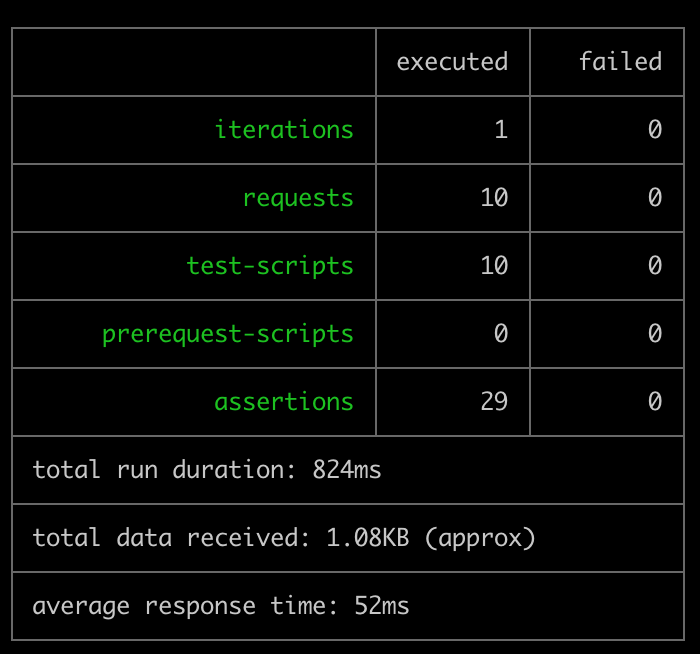
newman run restfulbooker.collection.json -e restfulbooker.environment.json
(This command should be in a line with no returns; it’s OK if it wraps around to a second line, though.)
The “-e” in this command stands for “environment”. If all goes well, you should get a result that looks like this:
You can also run your tests from other file locations. To do this, simply specify the path to your files in your command. For example, if my files were in a folder called NightlyTests, which was in my Documents folder, and if I were using a Windows computer, I would use this command:
newman run C:UsersKJackvonyDocumentsNightlyTestsrestfulbooker.collection.json -e C:UsersKJackvonyDocumentsNightlyTestsrestfulbooker.environment.json
Now that you know how to run your tests from the command line, you can set up your tests to run automatically with a cron job or in a CI/CD platform such as Jenkins. Just be aware that whatever machine you run your tests on will need to have Newman installed.
You can also have your test results write to a file with the -r command. For example, you can have your results written in junit with this command:
newman run restfulbooker.collection.json -e restfulbooker.environment.json -r junit
When the tests are finished running, a Newman folder will be created with your test results inside.
I hope that this tutorial has given you some ideas about how you can automate your API testing! Next week we’ll move on to UI tests with Selenium.
Nice post, thanks for this.
I'm glad you liked it, Arjun!
Great post Kristin. Would love to see a follow up with your thoughts on what to test in services, such as contract validation etc. Also since REST APIs are stateless if you've encountered good ways to get around (hooks) initial authentication and basic calls to directly get to the endpoints being tested. Thanks!
I'm glad you enjoyed my post! I talked a bit more about what to test in API services in my blog posts from last February and March, so be sure to check those out! As for authentication, I've never found it to be a hassle in API testing, because it's so easy to save the token or cookie as a variable and use it in all subsequent requests. But another option would be to use mocks or stubs. Postman has mocking capabilities, but I haven't used them, so can't comment on how they work. However, I have written stubs directly into the code that will return a positive response for any call to the authenticated service, so that might be a route you could take. I hope this helps!
The article is more informative. This is more helpful for our software testing training institute in chennai. Thanks for sharing
Great Article. Thank you for sharing! Really an awesome post for every one.
Project Centers in Chennai
JavaScript Training in Chennai
Final Year Project Domains for IT
JavaScript Training in Chennai