One of the things that makes me happy about API testing is how easy it is to organize tests and environment variables. I love having test suites ready at a moment’s notice; to run at the push of a button when regression testing is needed, or to run automatically as part of continuous integration.
This week I’ll be talking about some organizational patterns you can use for your API tests. I’ll be discussing them in the context of Postman, but the concepts will be similar no matter what API testing platform you are using.
First, let’s discuss environments. As you recall from last week’s post, an environment is a collection of variables in Postman. There are two different ways I like to set up my Postman environments. In order to explain them, I’ll use some scenarios. For both scenarios, let’s assume that I have an application that begins its deployment lifecycle in Development, then moves to QA, then Staging, and then Production.
In my first scenario, I have an API that gets and updates information about all the users on my website. In each product environment (Dev, QA, Staging, Prod), the test users will be different. They’ll have different IDs, and different first and last names. The URLs for the product environments will each be different as well. However, my tests will be exactly the same; in each product environment, I’ll want to GET a user, and PUT a user update.
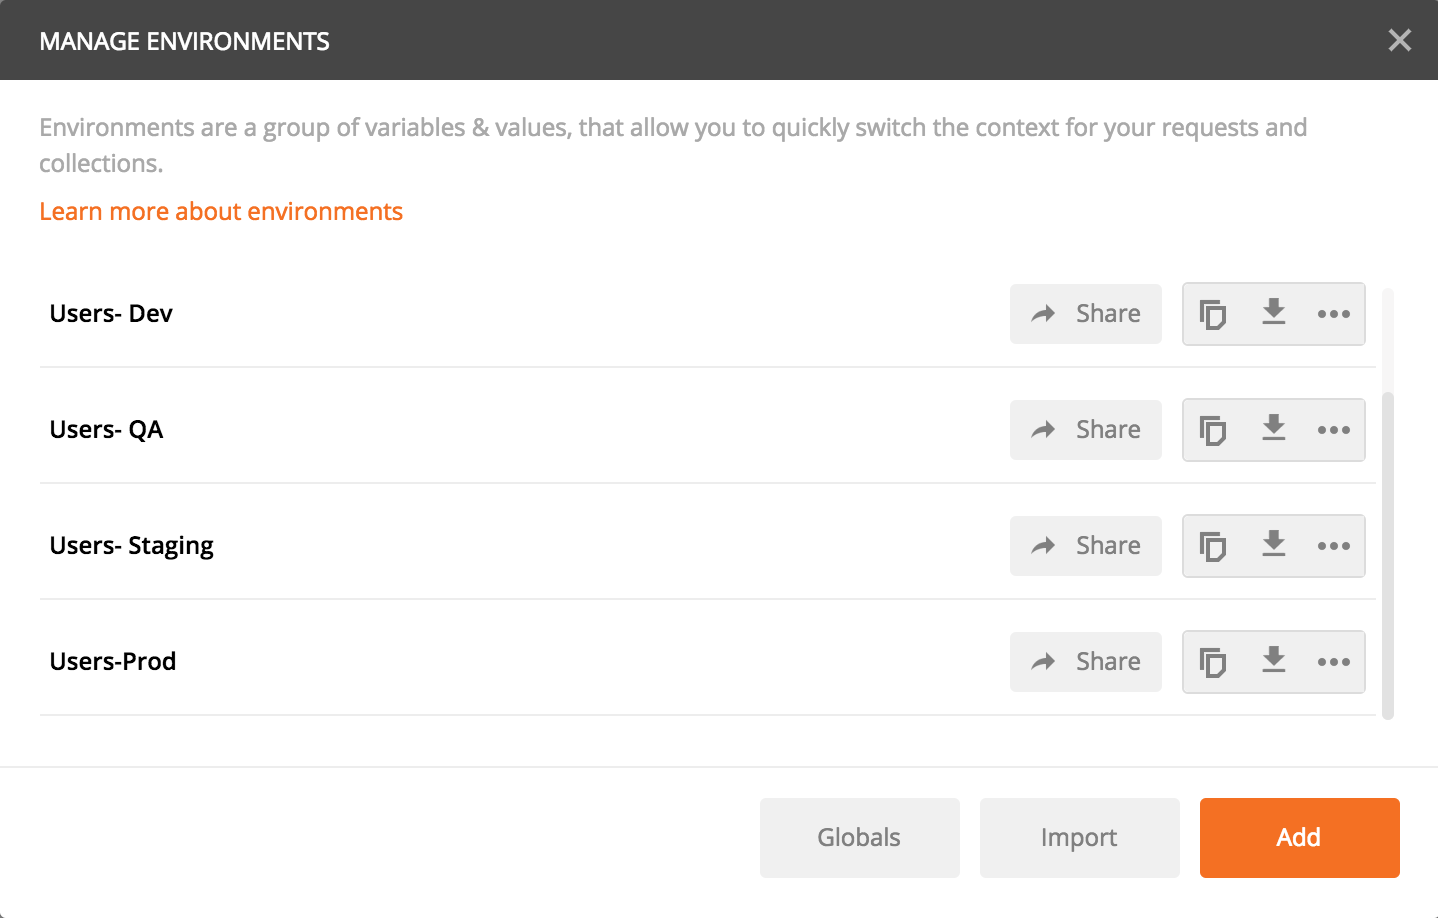
So, I will create four different Postman environments:
Users- Dev
Users- QA
Users- Staging
Users- Prod
In each of my four environments, I’ll have these variables:
environmentURL
userId
firstName
lastName
Then my test collection will reference those variables. For example, I could have a test request like this:
GET https://{{environmentURL}}/users/{{userId}}
Which environment URL is called and which userId is used will depend on which Postman environment I am using. With this strategy, it’s easy for me to switch from the Dev environment to the QA environment, or any other environment. All I have to do is change the Postman environment setting and run the same test again.
The second scenario I use is for situations like this one: I have a function that delivers an email. The function uses the same URL regardless of the product environment. I like to pass in a timestamp variable, and that stays the same (it shows the current time) regardless of what environment I am using. But I like to change the language of the email depending on what product environment I am in.
In this case, I am creating only one Postman environment:
Email Test
My one Postman environment has this variable:
timestamp
My test collection, however, has one test for each product environment. So I have:
Send Email- Dev
Send Email- QA
Send Email- Staging
Send Email- Production
Each request includes the timestamp variable, but has a variation in what is sent in the body of the email. For the Dev environment, I use a request that contains “Dev” in the message body, for the QA environment, I use a request that contains “QA” in the message body, and so on.
When deciding which of these two environment strategies to use, consider the following:
- what stays the same from product environment to product environment?
- what changes from product environment to product environment?
If there are many variables that change from product environment to product environment, you may want to consider setting up multiple Postman environments, as in my first scenario. If there are only one or two things that change from environment to environment, and if the URL doesn’t change, you may want to use the second scenario, which has just one Postman environment, but different test requests for each product environment.
Now let’s talk about ways to organize our tests. First, let’s think about test collections. The most obvious way to organize collections is by API. If you have more than one API in your application, you can create one collection for each of the APIs. You can also create collections by test function. For example, if I have a Users API, and I want to run a full regression suite, a nightly automated test, and a deployment smoke test, I could create three collections, like this:
Users- Full Regression
Users- Nightly Tests
Users- Deployment Smoke
Finally, let’s think about test folders. Postman is so flexible in this area, in that you can use any number of folders in a collection, and you can also use sub-folders. Here are some suggestions for how you can organize your tests into folders:
By type of request: all your POST requests in one folder; all your GET requests in another
By endpoint: GET myapp/users in one folder; GET myapp/user/userId in another
By result expected: GET myapp/users Happy Path requests in one folder; GET myapp/users bad requests in another folder
By feature: GET myapp/users with a Sort function in one folder, and GET myapp/users with a Filter function in another
As with all organizing efforts, the purpose of organizing your tests and environments is to ensure that they can be used as efficiently as possible. By looking at the types of tests you will be running, and what the variations are in the environment where you will be running them, you can organize the Postman environments, collections, and folders in such a way that you have all the tests you need immediately at your fingertips.
Next week, we’ll be talking about running collections from the command line, and setting tests to run automatically!