Last week, we talked about all the things you should check before you log a bug, in order to make sure that what you are seeing is really a bug. Once you have run through all your checks and you are sure you have a bug, it’s time to log it. But just throwing a few sentences in your team’s bug-tracking software is not a good idea! The way you log a bug and the details that you include can mean the difference between a bug being prioritized or left on the backlog; or the difference between a developer being able to find the problem, or closing the bug out with a “cannot repro” message. In this post, I’ll outline some best practices for logging a bug, with examples of what to do and what not to do.

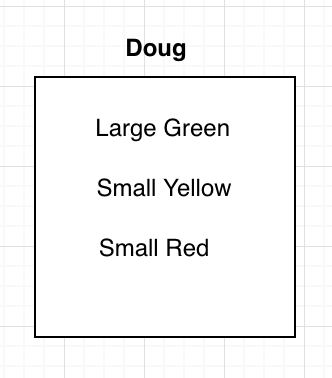
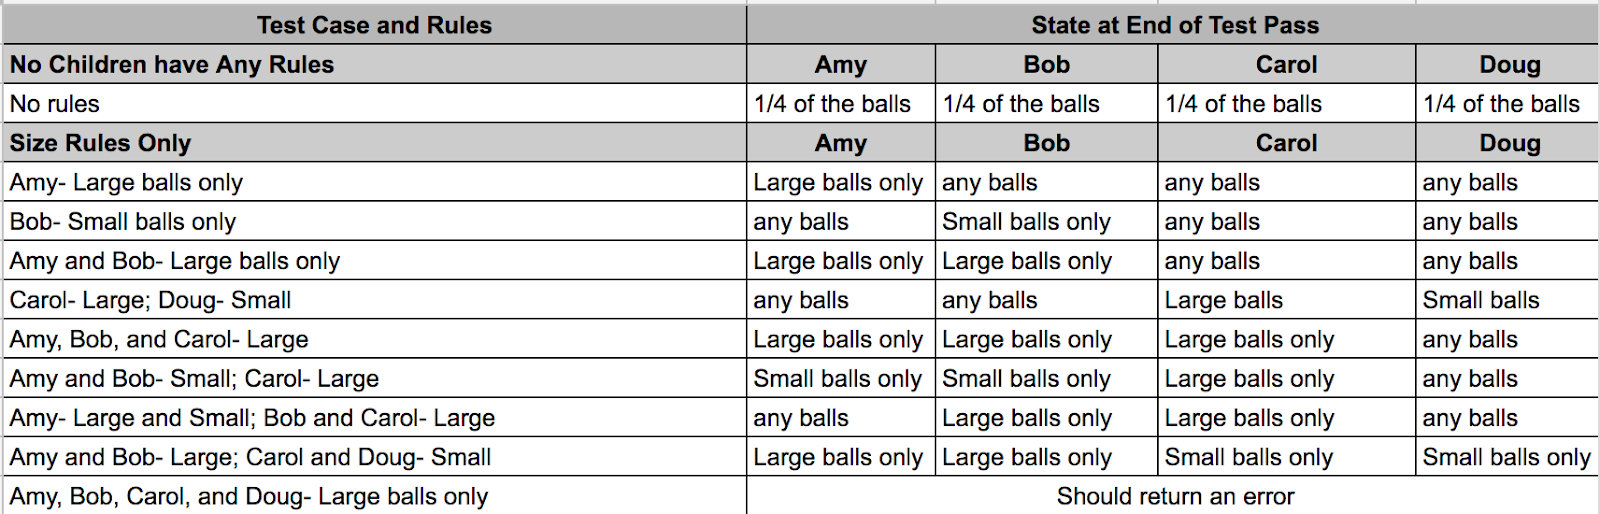
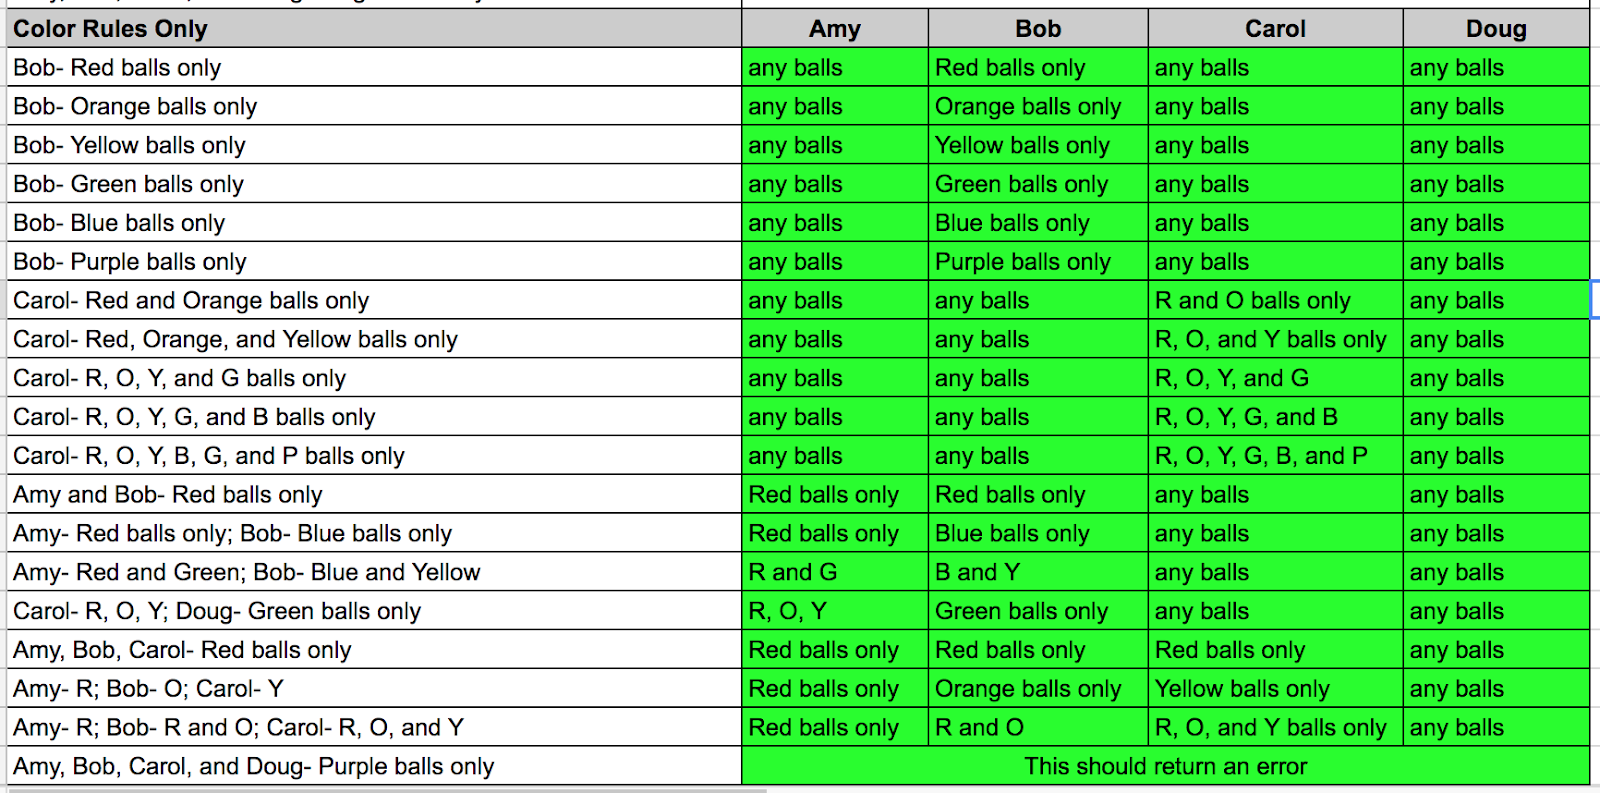
Let’s take an example bug from the hypothetical Superball Sorter that I described a few weeks ago. Imagine that when you tested the feature, you discovered that if three of the children have a rule where they accept only large balls of some color, the small purple ball is never sorted.
Here are the components of a well-logged bug:
Title: The title of the bug should begin with the area of the application it is referring to. For example, if a bug was found in the Contacts section of your application, you could begin the title with “Contacts”. In this case, the area of the application is the Superball Sorter. After the application area, you should continue the title with a concise statement of the problem.
RIGHT: Superball Sorter: Small purple ball is not sorted when three children have large ball rules
WRONG: Small purple ball not sorted
While the second example gives at least a clue as to what the bug is about, it will be hard to find among dozens of other bugs later, when you might try to search by “Superball”. Moreover, it doesn’t state what the conditions are when the ball is not sorted, so if there is another bug found later where this same ball isn’t sorted, there could be confusion as to which bug is which.
Description: The first sentence of the bug should describe the issue in one sentence. This sentence can provide a bit more detail than the title. I often start this sentence with “When”, as in “when I am testing x, then y happens”.
RIGHT: When three children have sorting rules involving large balls, the small purple ball is not sorted.
WRONG: Doug doesn’t get the small purple ball
There are a number of things wrong with this second example. Firstly, the issue happens regardless of which three children have rules where they get only large balls, so referring to Doug here could be misleading. Secondly, the statement doesn’t describe what rules have been set up. A developer could read this sentence and assume that the small purple ball is never sorted, regardless of what rules are set up.
Environment and browser details: These can be optional if it’s assumed that the issue was found in the QA environment and if the issue occurs on all browsers. But if there’s any chance that the developer won’t know what environment you are referring to, be sure to include it. And if the issue is found on one browser but not others, be sure to mention that detail.
RIGHT: This is happening in the Staging environment, on the Edge browser only
Steps to reproduce: The steps should include any configuration and login information, and clearly defined procedures to display the problem.
RIGHT:
1. Log in with the following user:
username: foobar
password: mebs47
2. Assign Amy a rule where she gets large red balls only
Assign Bob a rule where he gets large orange balls only
Assign Carol a rule where she gets large yellow balls only
3. Create a set of superballs to be sorted, and ensure that there is at least one small purple ball
4. Run the superball sorter
5. Check each child’s collection for the small purple ball or balls
WRONG:
Everyone has a rule but Doug, and no one is getting the small purple ball
The above example doesn’t provide nearly enough information. The developer won’t know the login credentials for the user, and won’t know that the three rules should be for large balls.
ALSO WRONG:
1. Open the application
2. Type “foobar” in the username field
3. Type “mebs47” in the password field
4. Click the login button
5. Go to the Superball Sorter rules page
6. Click on Amy’s name
7. Click on the large ball button
8. Click on the red ball button
9. Click the save button
10. Click on Bob’s name
etc. etc. etc.